

Design Portfolio
· In what ways have you considered the sustainability of your project process and outcomes?
I have considered the material and ink used in my design to be sustainable by using eco-friendly ink and recycled paper
· In what ways have you considered the ethical implications of your project process and outcomes?
The ethical implications of my design could be the fact that i have used photo manipulations which are discouraging from the truth, for the purpose of this brief.
· In sustainability and ethical terms in what ways was your work in this project an improvement or a backward step for you as a socially conscious designer?
This project was an improvement in terms of being a socially conscious designer as i learnt about the ethical parts of photo manipulation
· What targets can you make at this point for your work in the future as a socially conscious designer?
My targets will include researching sustainable options to propose to my clients using my designs and to continue to think about the Do Good Design pledge in my designs, even if this could prove more challenging.
In what ways does the visual communication/message of the piece meet the needs of the brief?
The visual communication / message on my design piece meets the needs of the brief because i have been able to critically explore the role of research to inform design solutions. I used a variety of primary and secondary research to reach my final design to ensure that i have visually communicated to my target audience of designers, photographers, students, general public that may be interested in Conspiracy theories and photography manipulations.
What are the strengths of the visual communication? Why?
I feel the strengths of my visual communication lie in the images themselves, showing modern attire and technology which are recognised as not fitting into their surroundings, questioning the conspiracy theory of Time Travel.
What are the weaknesses of the visual communication? Why?
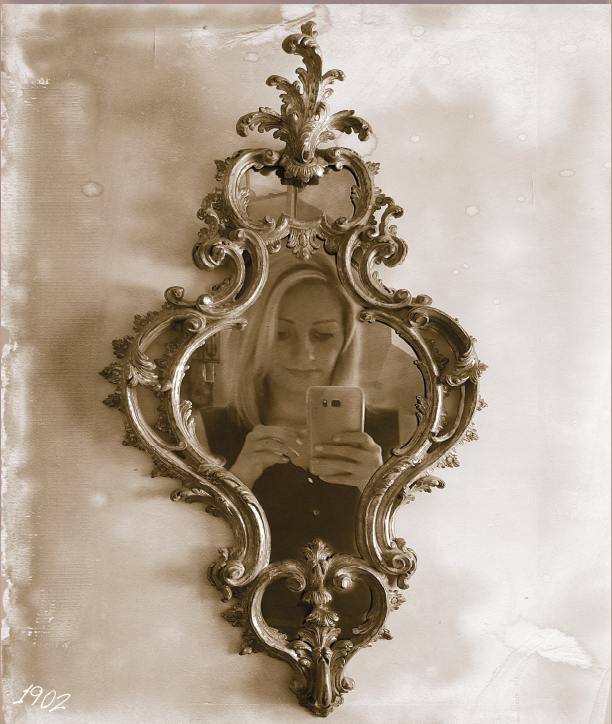
The image of the Time traveller selfie in the mirror could have had more visual communication in with the background to support its time period.
In what ways could the piece be mis-read or mis-understood by the audience? Be specific about who the audience is.
The audience could mis-understand the images if they do not recognise the manipulation taken place or understand they represent time travel. The type used in the title and anchored dates on the images help avoid this.
In what practical ways could the piece be developed or improved?
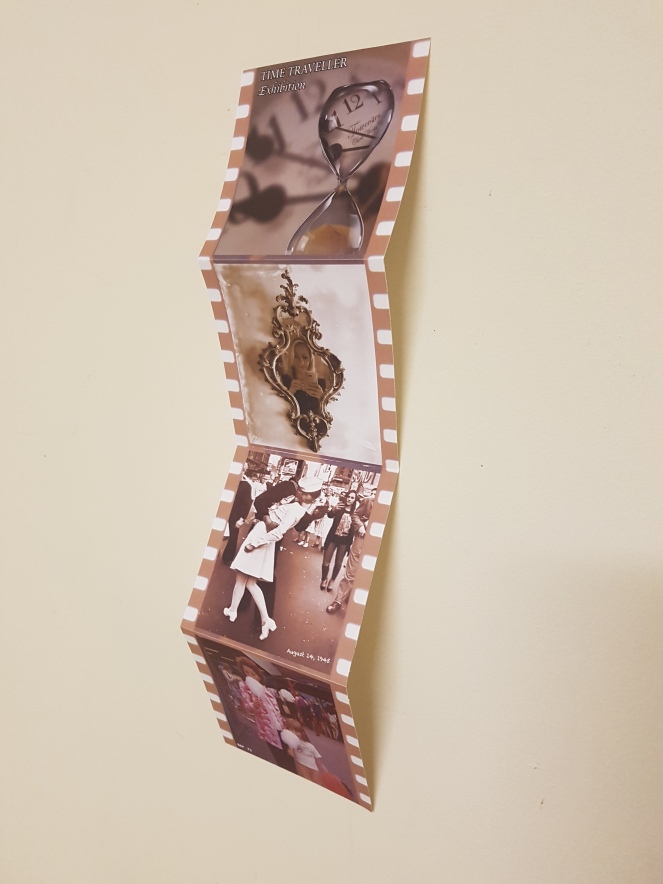
The piece could be improved by re-printing the design and folding more carefully on the consortina, as i found this hard to get perfect on submission
Reflection of own working practices:
How was my time keeping?
My time keeping as usual is very hit and miss, having a busy life outside of uni causes late nights to reach deadlines. Overall, i achieved everything i needed in the time given, Printing off mock ups and finals on time along with presenting my design development on the 20 slide pecha cusha.
How was my analysis of the brief?
When receiving the brief, i analysed it by making notes listening to the tutors and discussed my ideas with them so i could be prepared in advance to ensure that i was on the write track with my ideas.
How was my research?
My research was broad and under the guidance of both tutors, i covered areas that i would have otherwise missed. I used a range of technical and subject research, combining both to gain a better understanding and interest in photography. I referred back to the brief throughout my research and design to make sure i had covered the learning outcomes and tasks set.
How did I draw conclusions from my research?
I drew conclusion from my research by taking into consideration the different techniques used from other photographers, recording and applying what i felt would work with my design
How did I use research to generate and develop ideas?
I used a variety of research, advise from tutors, web and books from the library to gain inspiration and ideas for my time travel development.
How did I use evaluations to help with my ideas generation and development?
Throughout the development stage, i asked for opinions from my audience and tutor to make any initial changes, and carried on continuing to improve my design.
How did I use experimentation during the project? How can I make this more effective?
I experimented with different images and technicalities both within photoshop and the lighting and positioning of taking the photographs.
In what ways did I show that I had achieved the Learning Outcomes? How can I improve this next time?
I have shown the achieved learning outcomes by using a wide range of research and development recording this in my blogs and applying it to my actual design pieces. I have understood the importance of photo manipulation and searched through the history of photography to explore how the it has evolved over time.
What parts of the project did I enjoy most? Why was this the case?
I enjoyed learning more about photoshop the most and how to manipulate images to a high standard
What parts of the project did I enjoy least? Why was this the case?
I least enjoyed the finding of appropriate images to use for my project as this was time consuming
At what times did I work best? Why might this be the case? How can I ensure that I work well at al times?
I worked best with Tim being there to guide and teach me things to help improve my design and software skills. Speaking with Sancha and receiving advise for research and idea development helped move my design in the right direction.
What areas inspired me? Why was this the case? How could I follow these up?
The photographers in my research – Borsi and Cindt Sherman inspired me with their techniques and angles of visual communication with their audience. I followed these up in my own design.
What areas were challenging or difficult? Why was this the case?
The folding of the consortina book was challenging for me, as i had never made or experimented with different folds before.
How can I go about developing and improving the parts I found difficult?
Continuing to go with a challenge and not limit my design by my thinking of lack of abilities.
Do I need to develop certain skills? Do I need these now? Or later?
I will continue to develop my skills in photoshop, maybe working on some of my own family images and asking for guidance from the tutors more often.
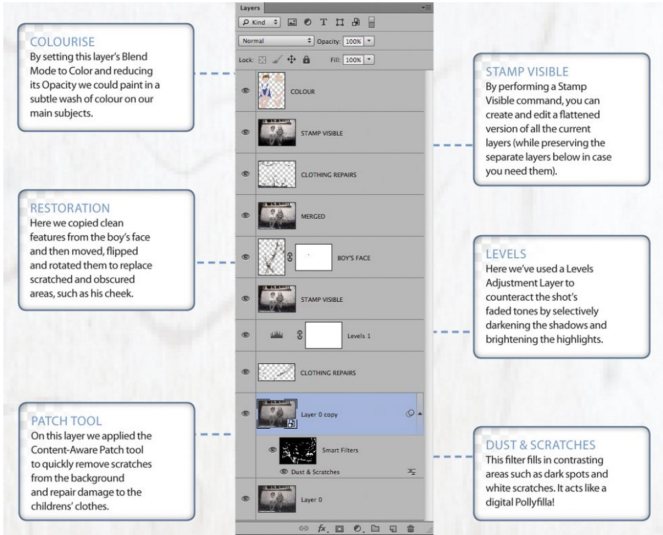
A part of my research in Photography, i looked into a form of photo manipulation to restore old photos. I came across this webpage tutorial which highlights the tools and filters used in Photoshop to rescue old images by removing typical blemishes like dust, scratches and stains.
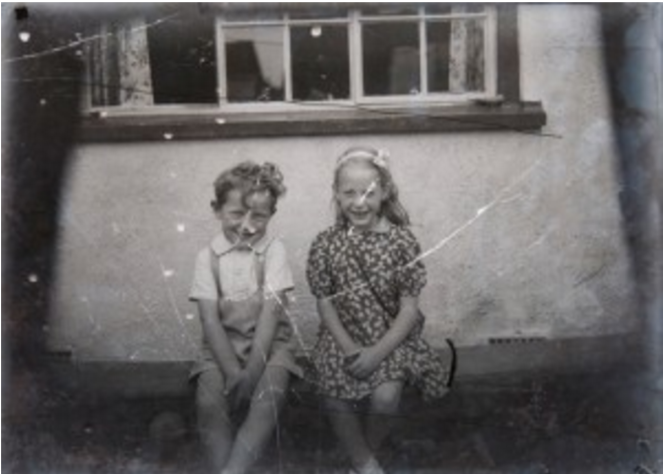
Our high quality digital files are also free from the wear and tear that can afflict an analogue print that has been handled, scuffed and even scrawled on over the years.
Old prints can also suffer from loss of tone and detail thanks to ongoing chemical reactions, such as ‘silvering’.
Silvering occurs in black and white photography when the black silver oxide is reduced to silver metal, the result is a reflective metallic patch in the image. The silver originates from the photosensitive silver bromide.
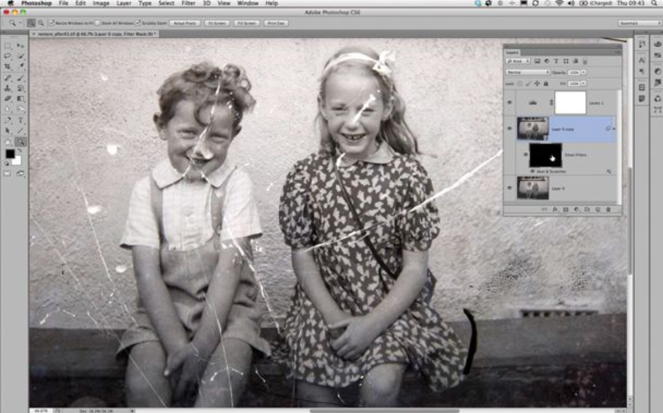
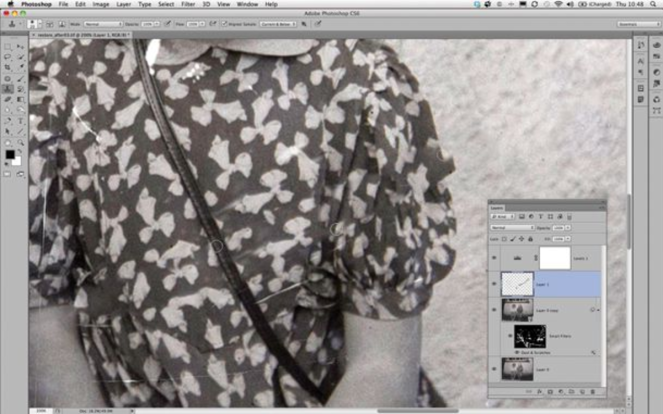
The tutorial shows a number of great techniques such as repairing water damage, healing scratches, reducing silvering, colorizing, dust busting, and tidying with the clone tool.
The transformation of an image using these tools in photoshop is a great way to see the benefits of manipulation without compromising the original effects of the photograph.
I will be using these tips and referring back to these when using Photoshop to improve photographs of my own.
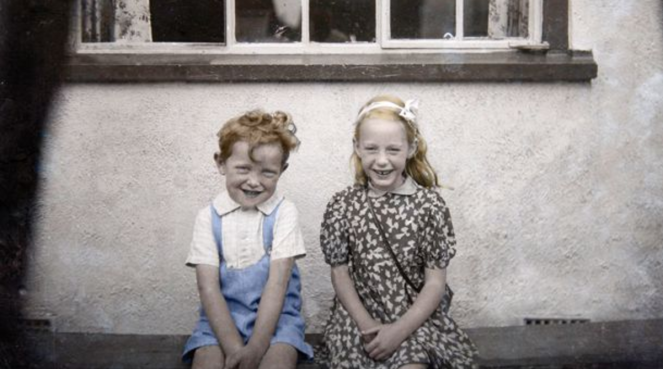
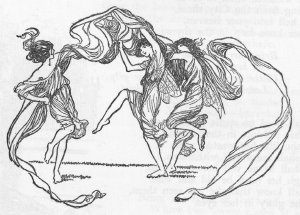
As part of my research on conspiracy theories and photography, I read up on how the Cottingley Fairies caused international controversy that pitted spiritualists against skeptics by their photographs with the mythical creatures – Fairies. It was interesting to see how the lack of technology back then with studying the photographs, left people to believe these images were real. As it says in this article though, the times also had an influence on their beliefs due to the upset of the War and needing something to reaffirm their belief in goodness and innocence.
In 1920 a series of photos of fairies captured the attention of the world. The photos had been taken by two young girls, the cousins Frances Griffith and Elsie Wright, while playing in the garden of Elsie’s Cottingley village home. Photographic experts examined the pictures and declared them genuine. Spiritualists promoted them as proof of the existence of supernatural creatures, and despite criticism by skeptics, the pictures became among the most widely recognised photos in the world. It was only decades later, in the late 1970s, that the photos were definitively debunked.
Snelling declared the photos were “genuine unfaked photographs of single exposure, open-air work, show movement in all the fairy figures, and there is no trace whatever of studio work involving card or paper models, dark backgrounds, painted figures, etc.”
Once they had received this stamp of approval, the fairy images began circulating throughout the British spiritualist community, and soon came to the attention of Sir Arthur Conan Doyle, author of the Sherlock Holmes mysteries. Doyle was a passionate believer in spiritualism, and he latched onto the images, convinced they were conclusive photographic proof of the existence of supernatural fairy beings.
Much of this belief might be attributed to the context of the times. By the end of World War One the English were emotionally bruised and battered by four years of unrelenting bloodshed. They seemed to be in need of something that would reaffirm their belief in goodness and innocence. They found this reaffirmation in the fairy photographs of Frances and Elsie.
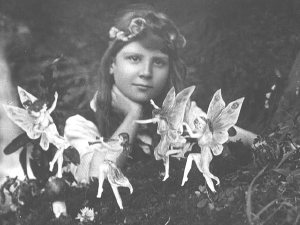
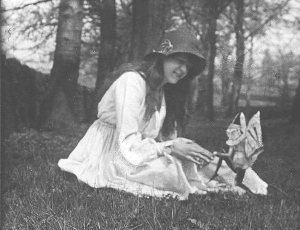

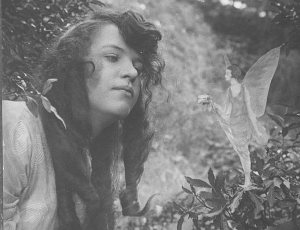
The girls cleverly manipulated photographic imagery by placing sketches of paper fairies cutouts which had been held in place with hatpins and took photographs with their fathers camera, Midg Quarter and later the Cameo Quarter camera.
http://hoaxes.org/photo_database/image/the_cottingley_fairies/
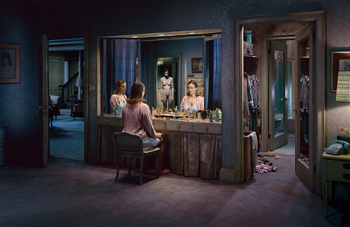
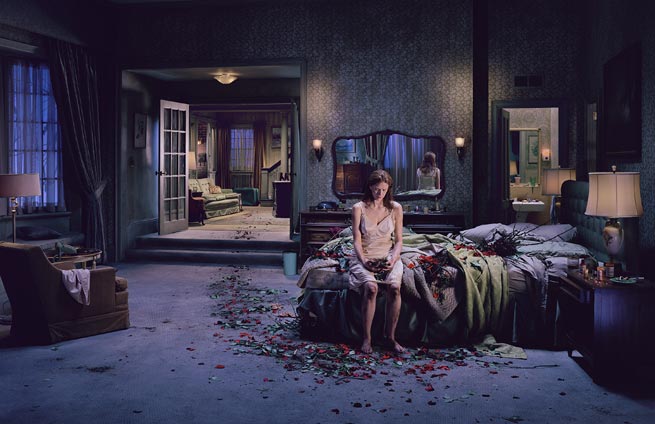
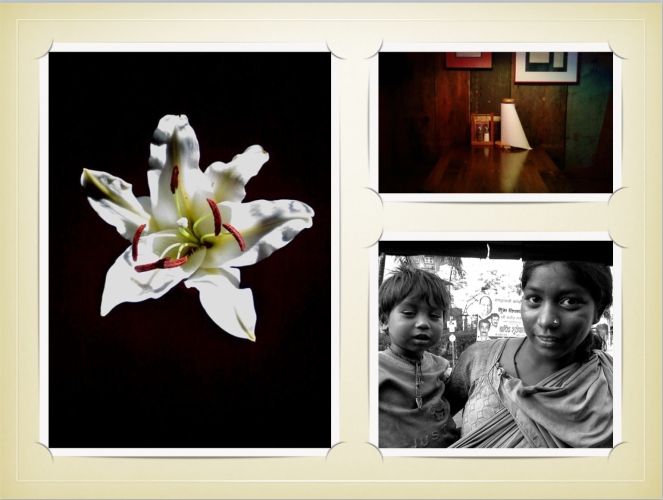
Gregory Crewdson is a photographer recommended to me to explore as part of my research for my idea development and photo manipulation. His images feature often disturbing surreal events. His photographs are elaborately staged and lit using crews familiar with motion picture production and lighting large scenes using motion picture film equipment and techniques.
Abandoned by the actors and crews that brought the sets to life, Crewdson decided to make the film sets themselves the subject of the photographs. Despite this change of direction, the artist’s vision persists: ‘As with much of my work’, suggests Crewdson, ‘I looked at the blurred lines between reality and fiction, nature and artifice, and beauty and decay.’
In this image he has placed a person in the reflection of the mirror, something not seen immediately to the eye. I like the eeriness of his images, by use of lighting and composition. He has created this effect without compensating on colour.

Slide 1
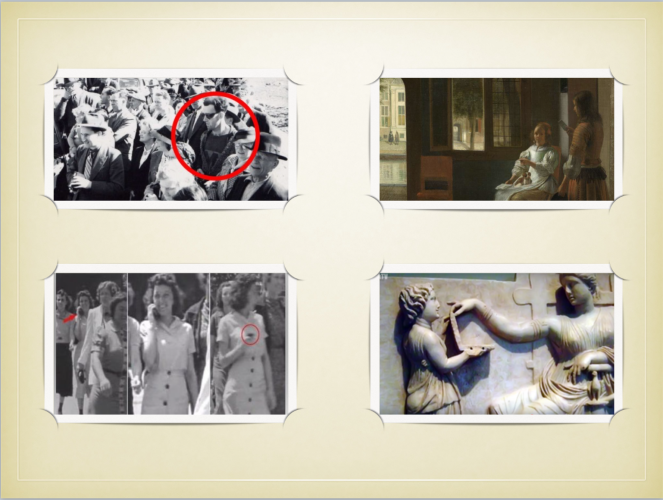
From Researching Conspiracy theories, I have chosen to do Time Travel as this would open up interesting and fun things to do with Photography. People have captured images apparently showing proof or tricky editing of Teleportation or Time Travel. It looks like someone is holding an IPHONE in this 1670 painting and an Ancient Greek Sculpture looks as though there is a modern laptop with USB ports.
Slide 2
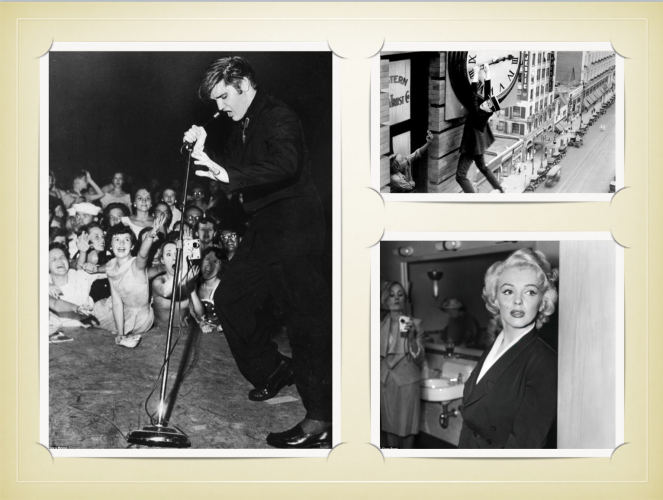
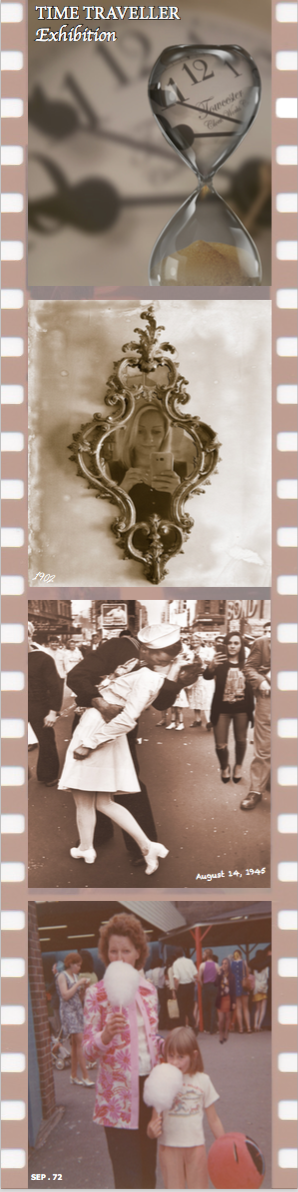
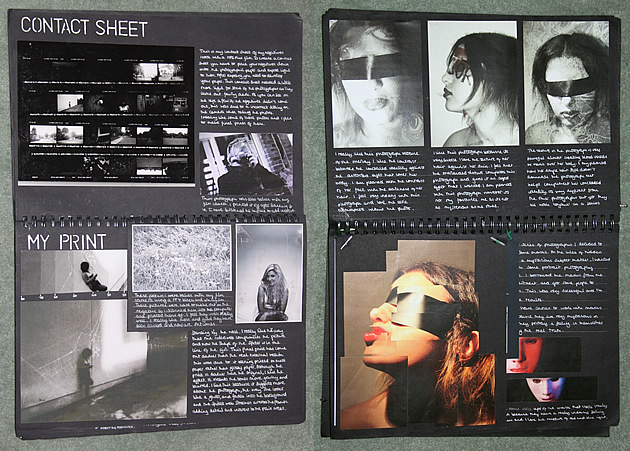
My research for photographers who have captured Time Travel brought me to Flora Borsi. She has created a series of photographs dubbed the ‘Time Travel Project’ that show her in some of the most iconic photos of all time. Borsi and her cellphone can now be seen in these images mixing with the likes of Marilyn Monroe and Elvis Presley at the height of their fame.
Slide 3
Joan Fontcuberta describes himself as a “teller of mistruths.” His mantra is simple: question everything. He says “People need to be sceptical of images that influence our behaviour and way of thinking. His mission is to warn people about the possibility that photography might be doctored and show why people need to be sceptical of images that influence our behaviour and our way of thinking.”
Slide 4
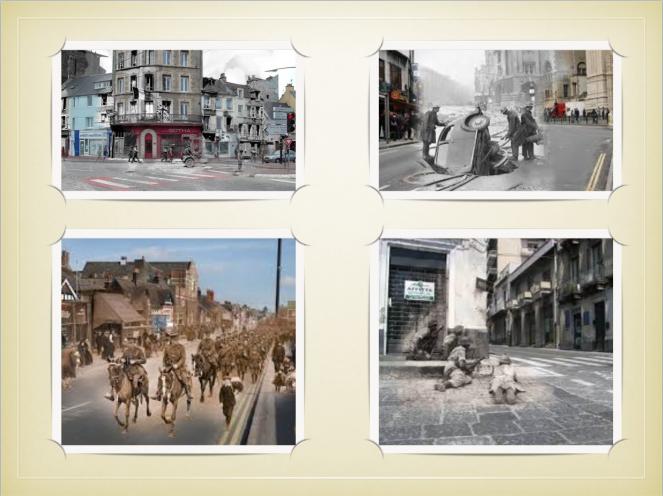
A Historical expert produced these Then and Now photographs and created a series of pictures by super-imposing the old pictures on top of new ones. She believes that making war scenes familiar by linking them to somewhere we recognise heightens their impact. These types of images could represent a Time-Portal effect in teleportation.
Slide 5
I started researching Photo Manipulation Techniques to learn what is important in gaining the desired effect using Photoshop & other similar programs. Rendering Images, Shadows, Proportion, Texture use, Enhancing, Colour Blending, Emphasis on Detail and combining multiple images. Using the right composition and turning them into something more attractive to the eye.
Slide 6
People are creating works of art using their smartphones due to developing technology they have pretty good cameras on them. In low light, camera phones slow the shutter speed to let in more light and have a longer opportunity to capture movement. I researched tips in achieving good photographs by this method to link with my idea development.
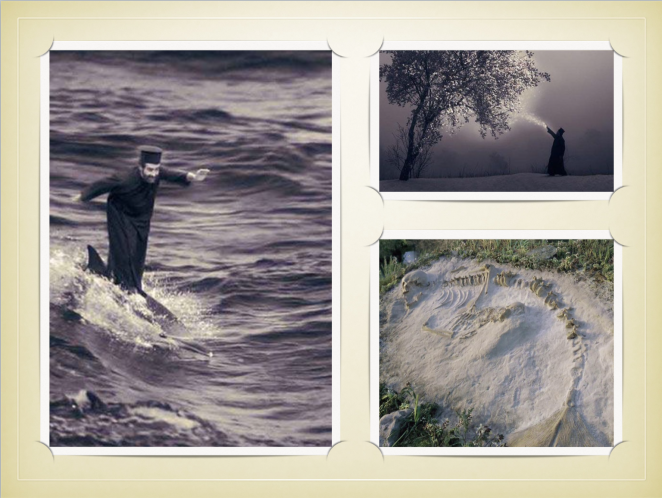
Slide 7
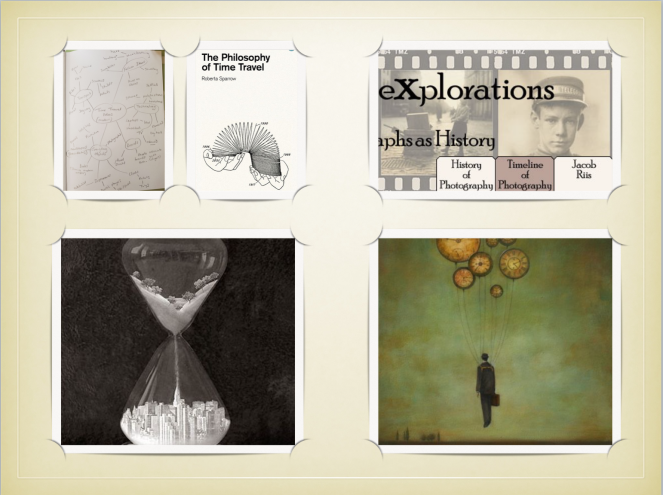
I started to brainstorm ideas of objects that can be used as semiotics to communicate the meaning of time travel in my design. I found the Hour glass image interesting with the manipulated image inside. The negative time-line image gave me an idea of how i could present my images on the souvenir book. The bottom right image reflects a time traveller well.
Slide 8
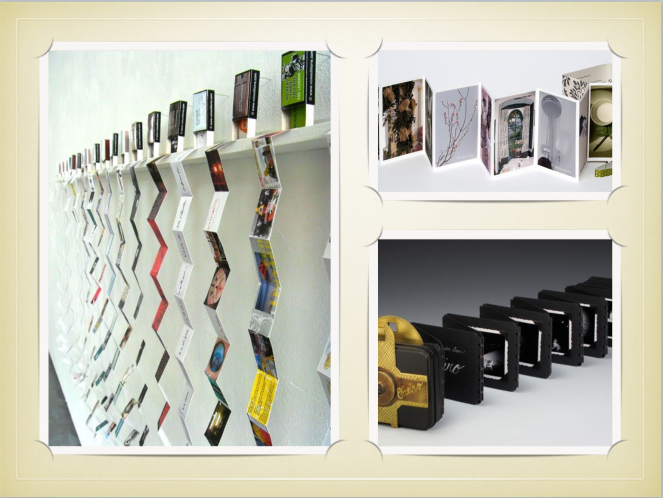
Concertina / accordion book gave me the idea of a photo album for the time traveler to save the images captured of their travels in time. It is an unusual format of folding which pages fan out for an interesting display. It Goes with the photography theme and will display the images well. Both sides can be used and it is reproducible.
Slide 9
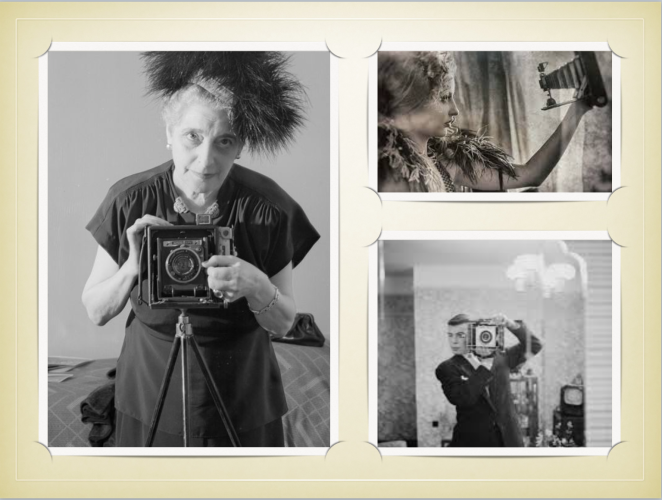
Vintage selfies come from well before the invention of the smartphone or Instagram, dating all the way back to the 1800s. My idea is to use photographic selfies and mirrors to reflect a time traveller in different eras by combining photographic images from now and then, using different backgrounds and objects to see time travel.
Slide 10
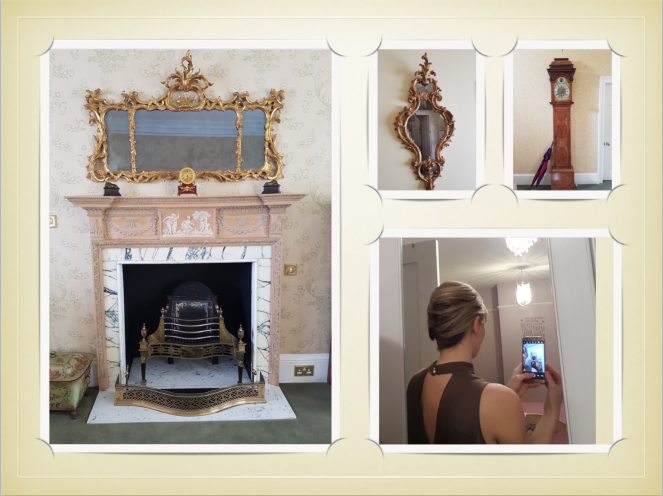
Here are some photographs i took in a victorian house which has a lot of old antique features which i could use in my time travel photography. I am going to experiment with taking selfies to impose a time traveller capturing their moment back in time.
These are some of the artists books that i thought were interesting due to their different layouts and techniques. I wanted something unusual for my souvenir book, something that challenged me as a designer, and took me out of my comfort zone from a usual bind book.
The images are laid out nicely in this artist book, the blank space leaving total focus on the photographs themselves.

The box idea i think is quirky,fun and a nice keepsake, which is what a souvenir is about. It can be a solid cube or one that opens up to more pages.


These consortina / accordion books remind me of an old wallet photo album. This image below would be a great design idea for my book going hand in hand with the photography theme and focusing mainly on the photos themselves. The folds are unusual and fan out into an interesting display.
Both sides can be used and it is reproducible.


These are some images i found which show signify through semiotics – Time Travel. I really like the idea of the clock and the hour glass having an image inside of it. It would add to the meaningful communication and sign process to use these types of images in my time travel book along with my photographs.


These electric blue space images represent the Quantum Mechanics of time travel in space or the universe. Things like travelling faster than the speed of light, Worm holes, Tipler cylinder and gravitational fields.


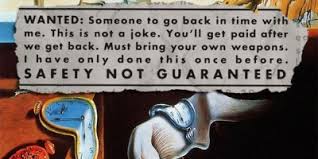
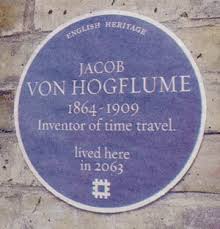
I liked these type images showing an article for a wanted time traveller buddy and a plaque which dates to the future recognising the time traveller inventor. These both make you think that the conspiracy is real by saying it has been done.
These images shown on a negative strip in a timeline gave me an idea for my layout in my book.
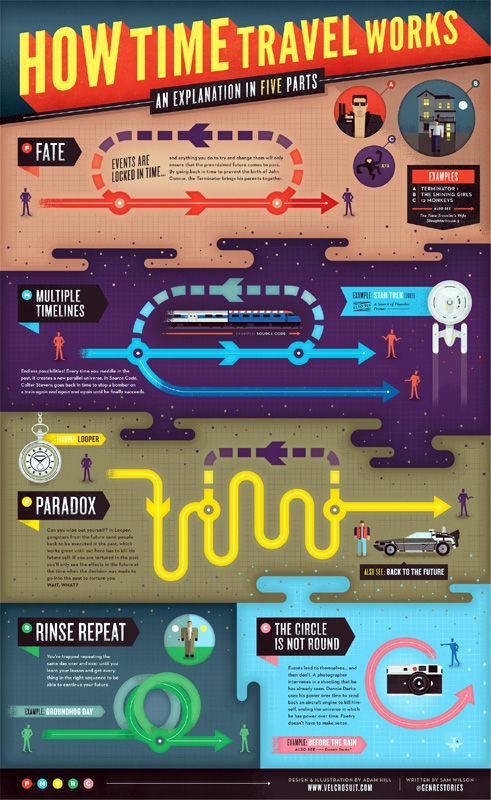
I like this infographic which approaches the technical and fun side of how time travel works.
Divergent Thinking
Spirals / Slinky =Connectivity and union with deific and cosmic energies, Revolutions of time, stars, plants and the way of natural progress
Maps = Travel
The philosopy of Time Travel = Space / Science / Time Machines
Looking Glass – Shows not everything meets the eye
Time = Hour glass / Clocks (face/digital/watch) Clock hands, Pocket watch
Time line
Wikipedia definition of Photo Manipulation – Researching and understanding
Photo manipulation involves transforming or altering a photograph using various methods and techniques to achieve desired results. Some photo manipulations are considered skilful artwork while others are frowned upon as unethical practices, especially when used to deceive the public, such as that used for political propaganda, or to make a product or person look better.
Some of the more common manipulations are using darkroom exposure techniques, such as burning (darkening) and dodging (lightening) a photograph, Retouching photographs using ink or paint, airbrushing, double exposure, piecing photos or negatives together in the darkroom, scratching instant films, or through the use of software-based manipulation tools applied to digital images. There are a number of software applications available for digital image manipulation, ranging from professional applications to very basic imaging software for casual users.
Rendering Images
Photo manipulations take various images (either stock images or ones you’ve photographed yourself) and merge them with others. Most people who are familiar with Photoshop use the Pen tool to cut out there images.
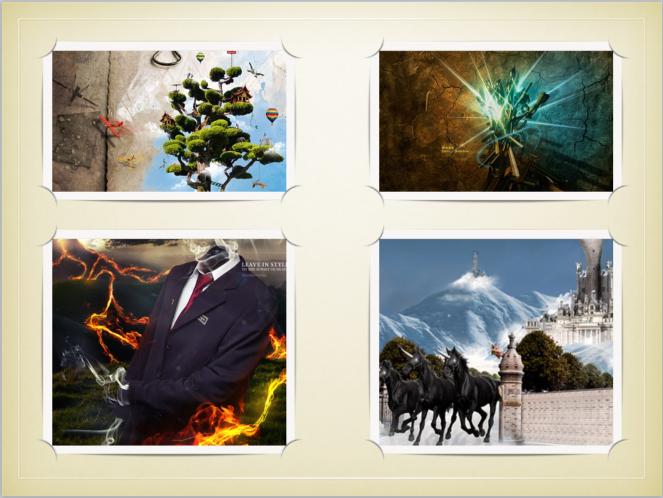
Shadows
Shadows help you make your image be as realistic looking as possible.Photo manipulations are made so that you can bring out things that would never happen in the real world. Shadows are our next focus and the second technique you should know before starting a photo manipulation project.Below is a great example of how shadows can add to the realism of your photo manipulation, even when it’s a fantasy scene.
The airplanes, paint brush, pencil, and the paint bucket all have shadows under them, which all add to the realism of the photo manipulation. A simple way to make them is to duplicate your original stock that you need the shadow for. Then turn it completely black. Then add a Gaussian Blur to it. Then you can reduce it in size and put it in the correct place.
Proportion
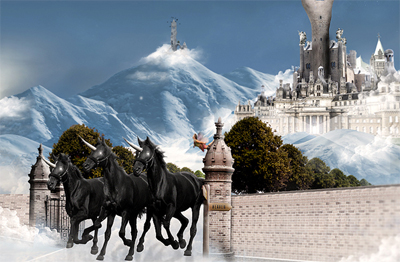
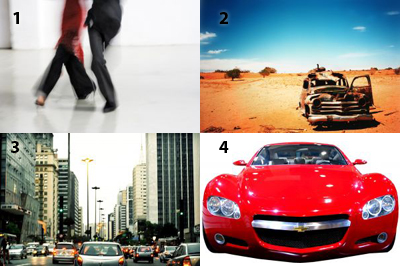
Proportion is one of the most important things when doing photo manipulations so that your design looks realistic. You can not have your dog bigger than your house, or your horse bigger than your car.
In the image below you can see that there is a castle all the way in the back of the image and note how small it is. Images that are supposed to be far away have to be smaller than the ones that are closer to you. Notice how the second castle to the right is proportioned to look big but not too big because it is near the horses. The mountains are proportioned to be big enough to go in front of the castle. The trees are correctly proportional to the size of the horses.
Texture Use
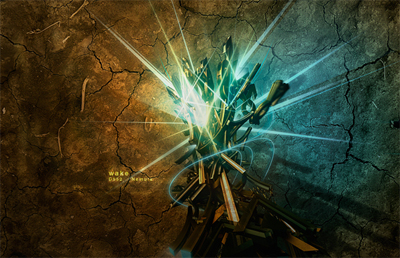
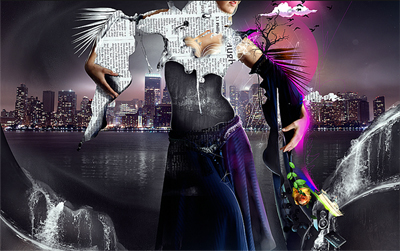
Now textures don’t necessarily add to the realism of your art, but they do add a nice kick to blend all your images together evenly. Blending is a huge part of photo manipulation, so textures are something you have to carefully pick out.Textures add to the depth of your art. If you are trying to go for a photo manipulation that is dark and dirty looking you can use a rough ground surface as a background texture; or if you are looking for something smoother you can use paper, or a wall texture. There are many textures you can consider using for your art.
Below is a photo manipulation with a grungy and dark feel to it. It uses a nice cracked surface texture. The three dimensional elements that the artist’s used are about the same colour as the texture, so they blend beautifully.
Picking Stock Images
It’s difficult to work with a blurry image in photo manipulations and it’s better to pick sharp images. very large and you can clearly see every angle and shape.
Colour Blending
Not every image you use is going to match your background, your texture, or even your other images. So that is where colour blending comes in. Things like Photo Filters and Gradient Maps are used in Photoshop to either add or take away colour in your images. This either gives a certain image that little boost of colour, or takes away that extra colour. This helps the images blend with one another and most importantly form a nice coherent work of art.
Emphasis on Detail
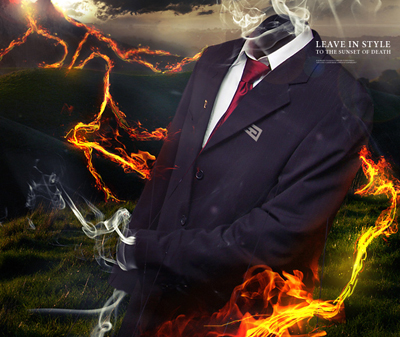
When creating a piece of art set one area as the main focus. You want to draw viewers eyes instantly to that spot. There are multiple techniques to do that. One way is to work on focusing attention on the most vibrant, colourful, or sharp area in the design. The fire is the first thing that catches your eye in the image below. The fire is the most vibrant and brightest part of the image, so it instantly stands out.
Combining Multiple Images
You need to plan your composition. Before opening Photoshop, take out a piece of paper and a pencil. Then sketch our your design. If you’re only doing a rough sketch, it takes about two minutes at the most. Consider where the stock images will go as you sketch. Decide the kinds of images you’ll need to find.
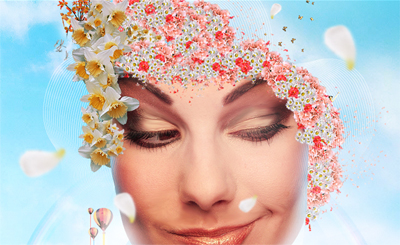
An example of great use of stock images is below. I love this piece because you can see there are a variety of images used. Notice everything in the composition. Look at the background scenery, the flower, and cassette tapes for example.There is a plethora of images in this artwork, but the composition maintains its coherency. In your design you can use a multitude of images, but they all have to flow properly, and be used to your advantage.
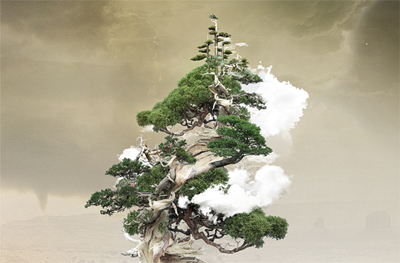
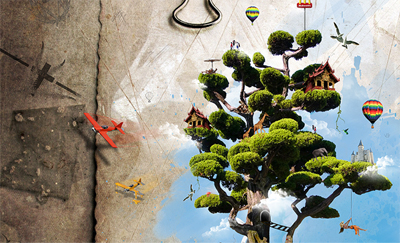
Enhancing a Stock Image
Stock images are often plain. Stock enhancement makes the images more attractive to the eye. The example below shows how a simple bonsai tree can be turned into a towering oak. The final composition has more branches and level and interest. The stock has been transformed. The designer took an image of a normal bonsai tree and duplicated it, changed sizes, manipulated its sides, and added more tree stocks.